Managing Appointments
Manage bookings from Appointments in the WordPress dashboard.
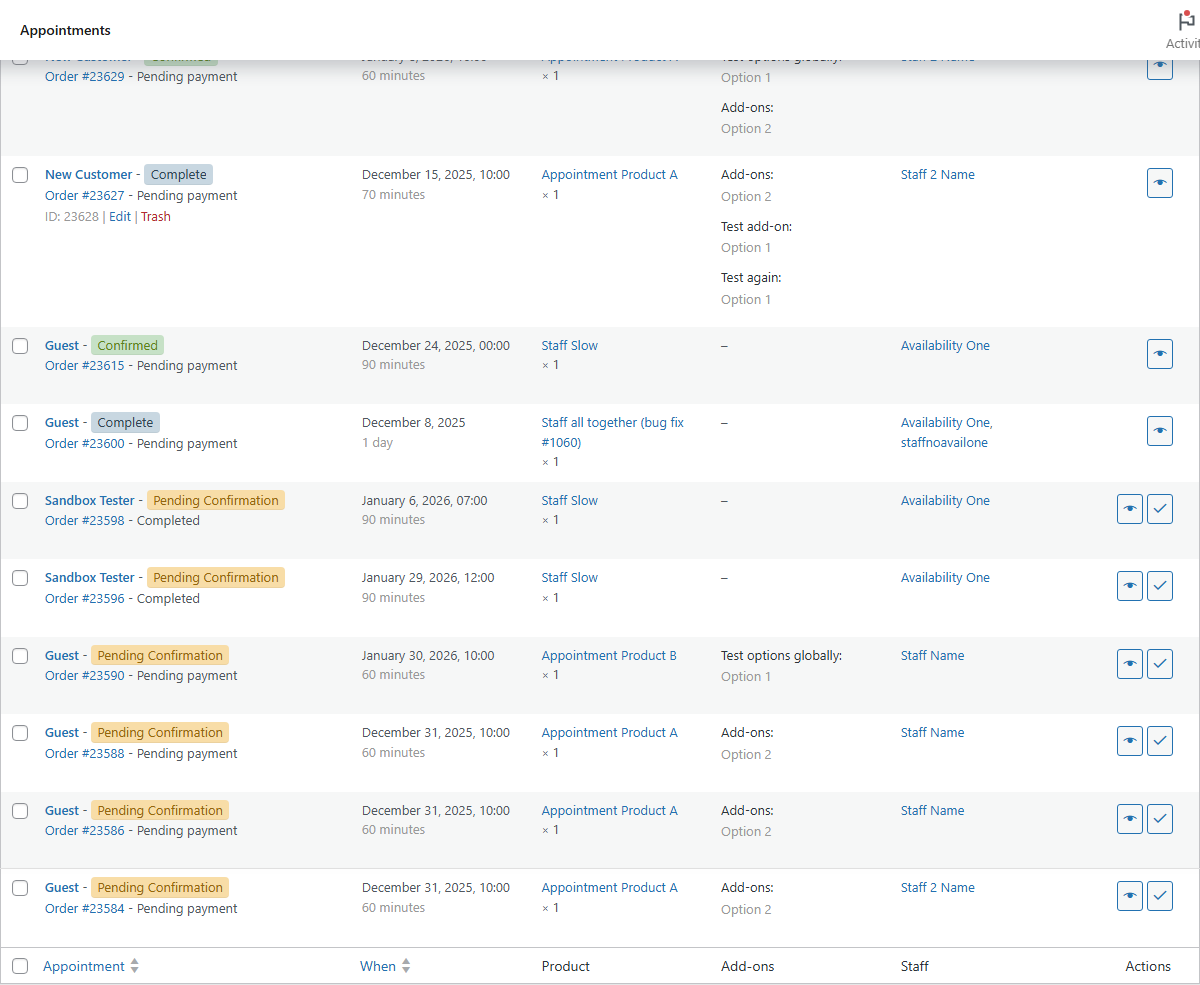
Appointments List
To view appointments which have been created, go to Appointments in admin. At the top of this screen you will also notice the standard filters and search area. Here you will see the list of appointments in order of date made:
With these you can:
- Filter by status using the status links at the top
- Use bulk actions:
- Move to trash
- Confirm appointments
- Unconfirm appointments
- Cancel appointments
- Mark appointments as paid
- Mark appointments as unpaid
- Filter by date
- Filter by the product
- Filter by staff
- Search (by customer, appointment ID, product, …)
At the far right of each appointment in the list are actions which you can perform on the row:

The two main actions are:
- View the appointment details in a separate screen.
- Confirm appointment that is pending approval.
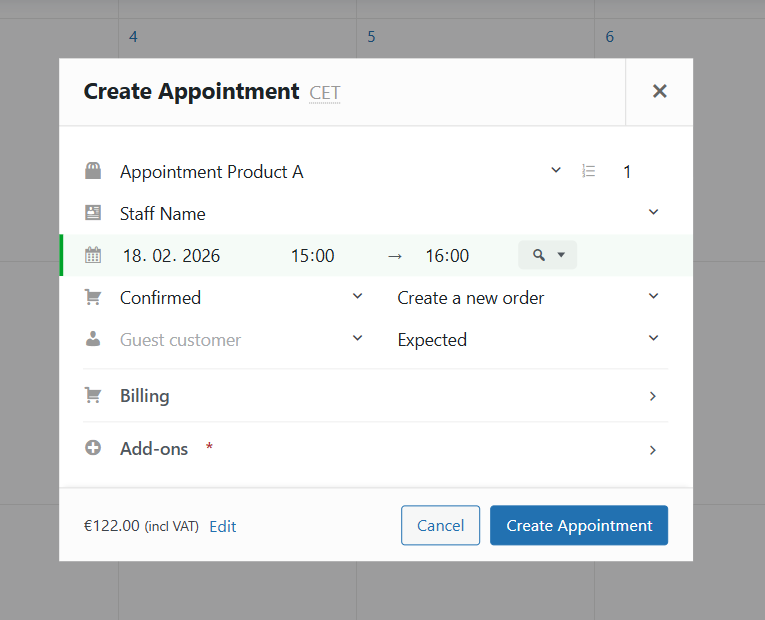
Creating Appointments (Modal)
You can create a new appointment manually from anywhere in the admin using the appointment creation modal. The modal can be opened from:
- Appointments → Add Appointment page
- Appointments list page (via the "Add New" button)
- Appointments → Calendar page (by clicking on an empty time slot)
When you open the modal from the calendar by clicking on a time slot, the date and time fields will be automatically prefilled with your selection.
The modal contains all appointment fields in a single form:
- Product & Quantity: Select an appointable product and set the quantity
- Date & Time: Choose the appointment date and time range (or date range for multi-day appointments)
- Staff: Assign a specific staff member (optional)
- Status: Set the appointment status (Confirmed, Unpaid, Paid, Pending Confirmation, etc.)
- Customer: Search for an existing customer or leave blank for a guest booking
- Order Options:
- Create a new order: A pending order will be created along with the appointment. This is useful if you want to create an appointment and have a customer pay for it before it's confirmed.
- Add to an existing order: Assign the appointment to an existing order, which will also calculate the cost of the appointment
- Billing Details: Expand the billing section to add customer billing information, payment method, and transaction ID
- Add-ons: If the selected product has add-ons, they will appear in a collapsible section
Fill out the required fields and click Create Appointment to save. You'll be redirected to the new appointment or order depending on your choices.
Appointment Modal (view/edit)
- Header with appointment title and close button.
- Status section in the modal body with segmented controls for quick status changes.
- Details: product, staff, date/time (with timezone), duration, quantity, price.
- Customer: name/email with quick links.
- Billing: phone/address reference.
- Order: linked order shortcut.
- Notes: internal notes and add-note field.
- Footer actions: open edit screen and close modal.
In 5.3.0, when editing an existing appointment from the admin panel, the slot browser keeps that appointment's current slot selectable (it is excluded from overlap counting for that same appointment/product).
Editing Appointments
If you click 'view' on an appointment you will be taken to the edit/view appointment page. This works like other admin pages like edit order, except its specifically made for displaying all relevant appointment data:
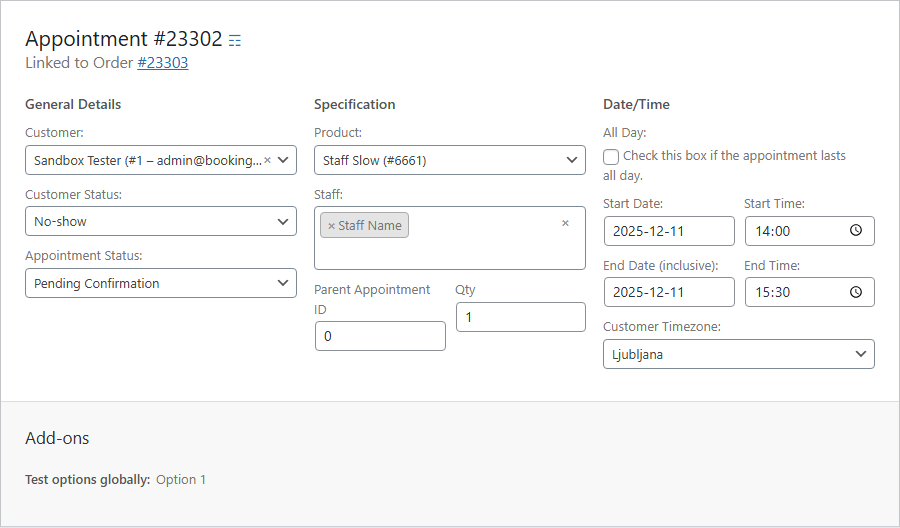
These details can be edited – just hit save when you are done. Be careful when changing start and end date. Be sure that the start date is always more recent than the end date. Also take into account that availability isn't checked if you edit the appointment Date/Time and/or Qty.
- Change status (Confirmed, Completed, etc.).
- Reschedule start/end.
- Reassign staff.
Availability is not checked when editing appointments. Manual date/time changes in the edit screen do not validate availability. Calendar drag-and-drop rescheduling also does not check availability—you can create conflicts. Only frontend customer bookings and rescheduling perform availability validation.
Statuses
| Status | Description |
|---|---|
| Unpaid | Booking created, payment not received |
| Pending Confirmation | Requires admin approval |
| Confirmed | Approved and scheduled |
| Paid | Payment received |
| Completed | Appointment has taken place |
| Cancelled | Cancelled by admin or customer |
Rescheduling
- Calendar: Drag/move or resize.
- Edit screen: Adjust Start/End and save.
Changes add a detailed note to the linked order showing previous and new time ranges.
Confirming & Cancelling
Confirming Appointments
To confirm an appointment, go to Appointments → All Appointments screen. Any scheduled product that requires confirmation will display as Pending Confirmation status. You can confirm the scheduled product by clicking on the Confirm button to the right:

After you've approved the appointment the user will get an email with a link to payment page. The customer can also pay by navigating to their My Account page.
- Confirm: Set status to
confirmed(supports bulk). - Cancel: Set status to
cancelled; frees slots and can send emails.
Emails are configurable under WooCommerce → Settings → Emails.
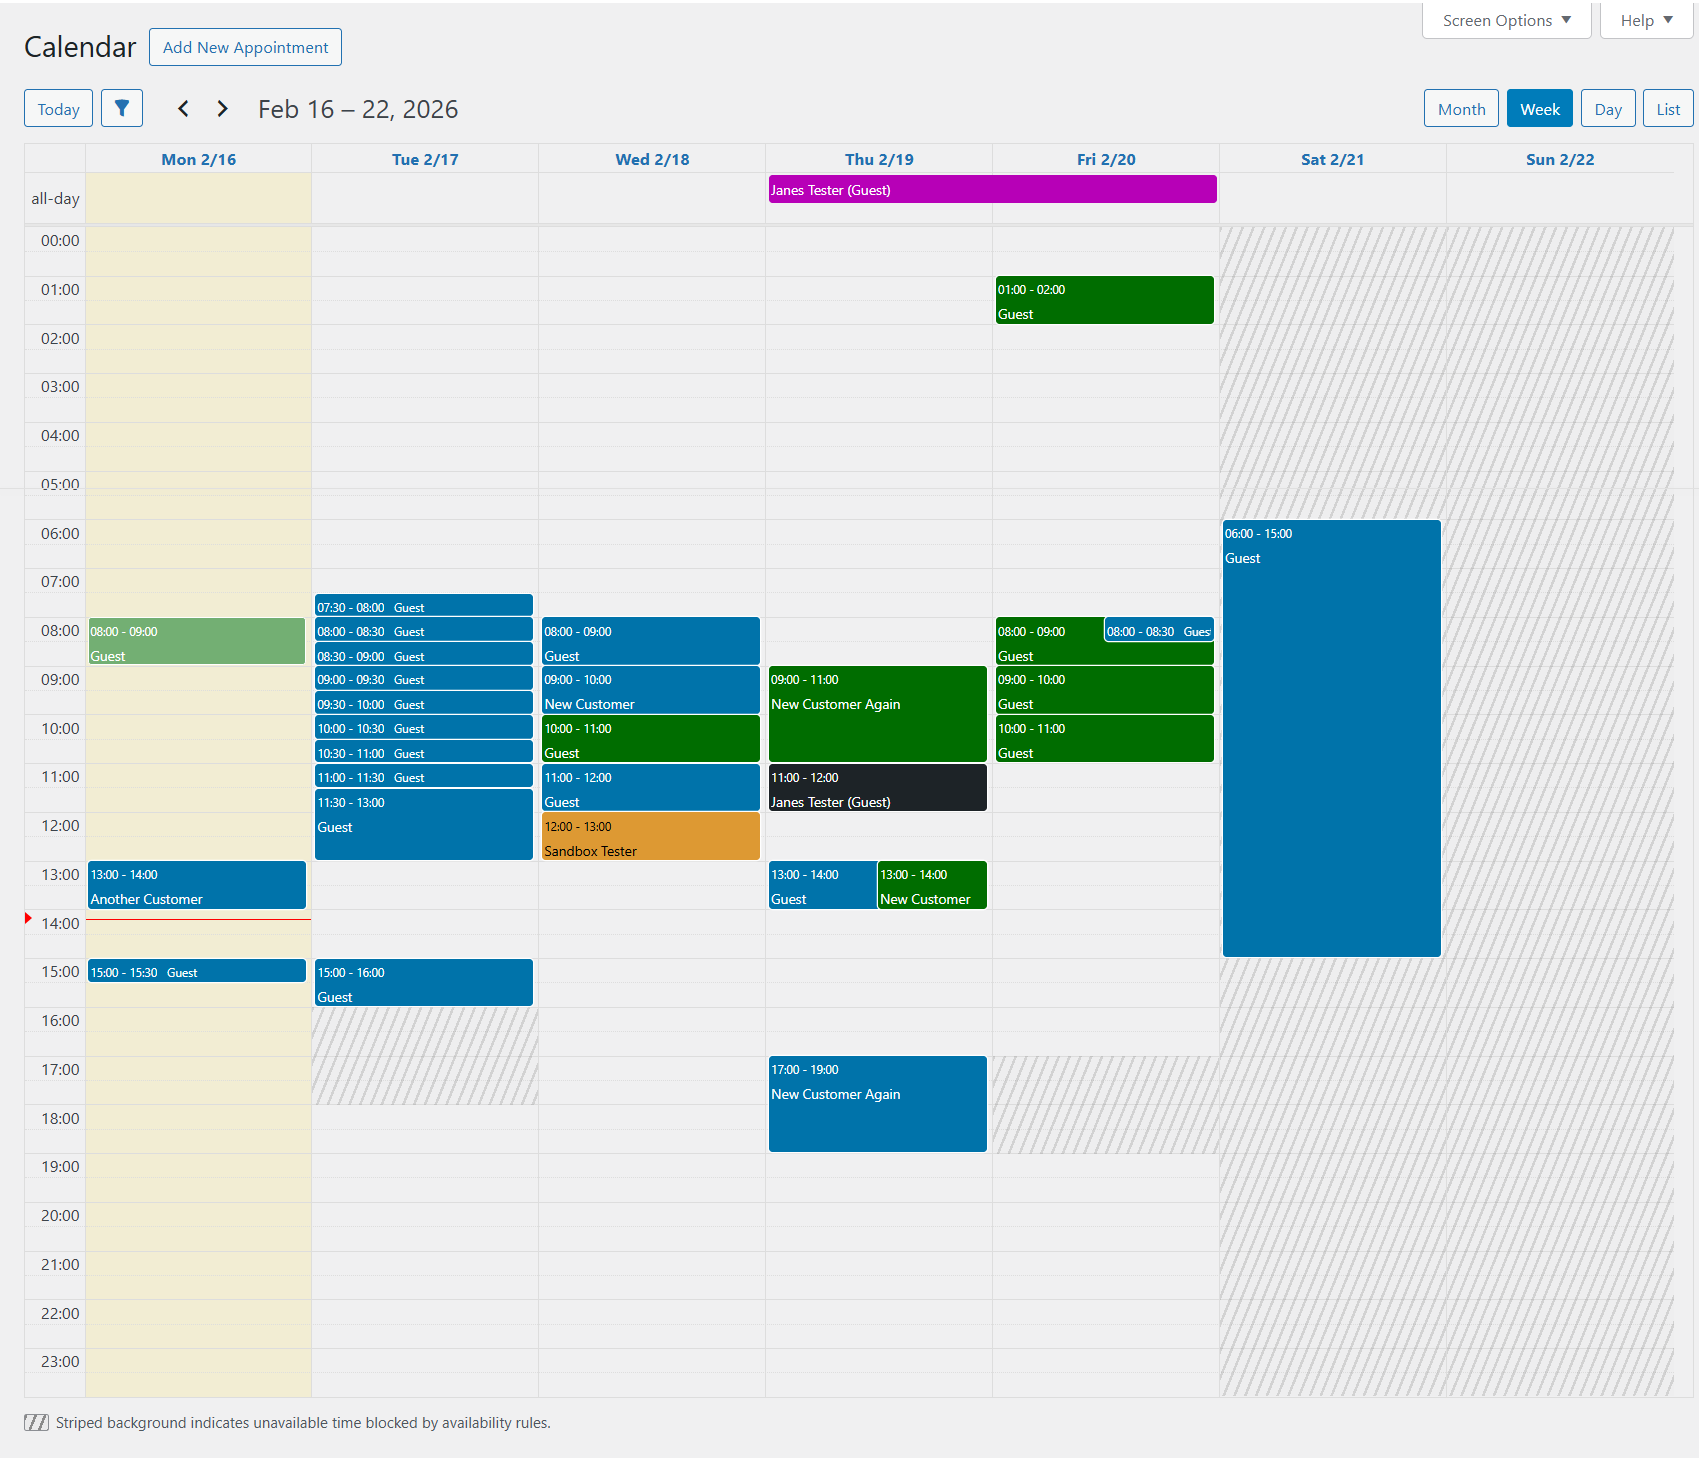
Calendar View
For a calendar view, go to Appointments → Calendar. By default this will show a month-based view, with filter options at the top.
- Click on an appointment to view its details
- Click on an empty time slot to open the appointment creation modal with the date and time prefilled
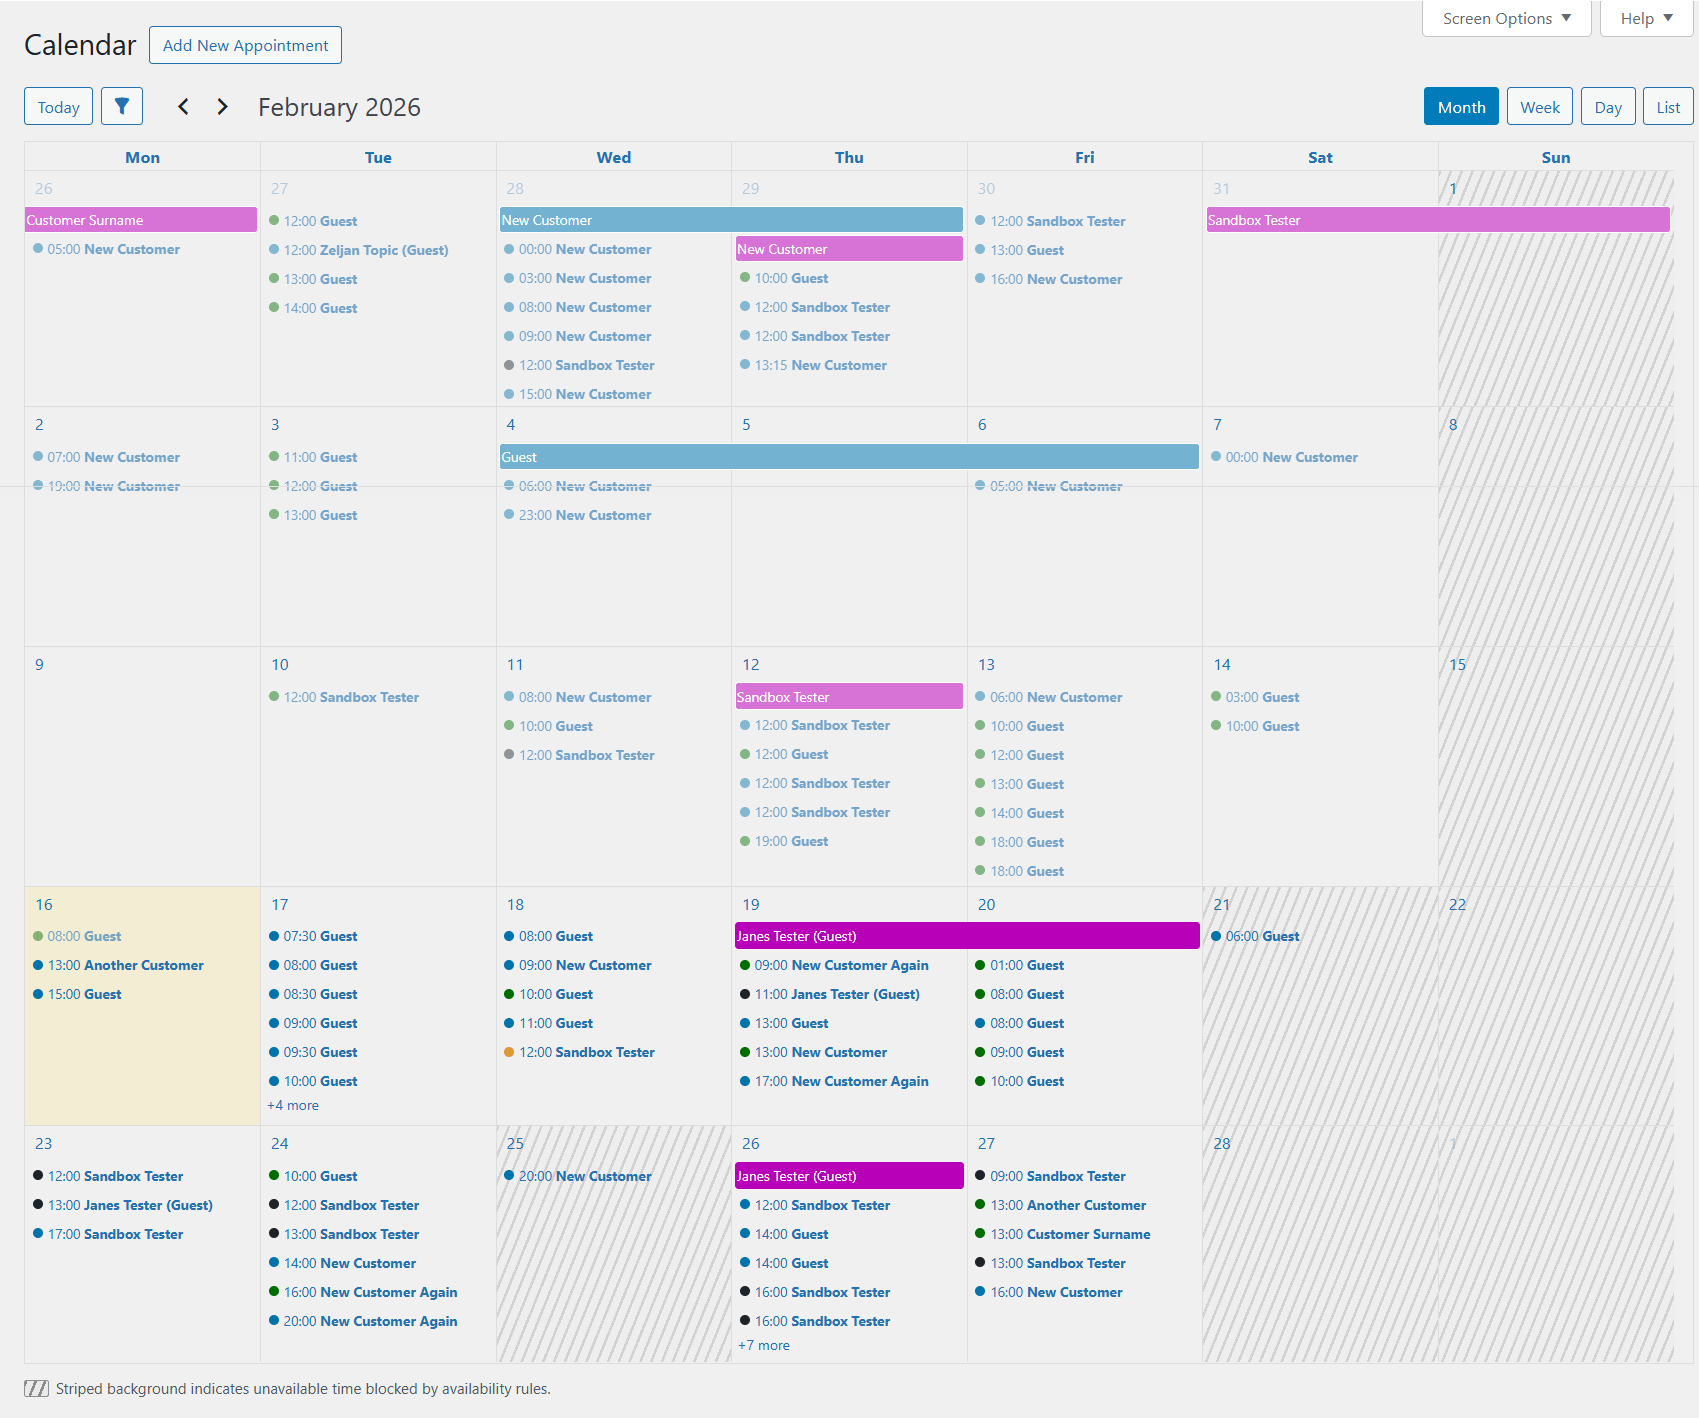
You can also view calendar in a Week, Day or Staff view. When you switch your calendar view it will stay preselected for your future appointment management.